Mozilla Firefox 12.0 can be installed in the
following Ubuntu operating systems: Ubuntu 12.04 LTS (Precise Pangolin),
Ubuntu 11.10 (Oneiric Ocelot), Ubuntu 11.04 (Natty Narwhal) and Ubuntu
10.04 LTS (Lucid Lynx).
To install Mozilla Firefox 12.0 on your system follow the next step-by-step (with screenshots) tutorial.
Step 1 - Add the Firefox 12.0 repository
No matter what Ubuntu operating system (see above supported OSes) you are running, open a terminal and paste the following command:
sudo add-apt-repository ppa:mozillateam/firefox-next
Hit the Enter key, type your password when asked and hit the Enter key. Hit Enter again when asked.
Don't close the terminal window! Proceed to the next step.
Step 2 - Install Firefox 12.0 on Ubuntu
Now paste the following command in the same terminal window:
sudo apt-get update && sudo apt-get install -y firefox
Your current Firefox installation will be overwritten. Wait for the installation to finish and close the terminal window.
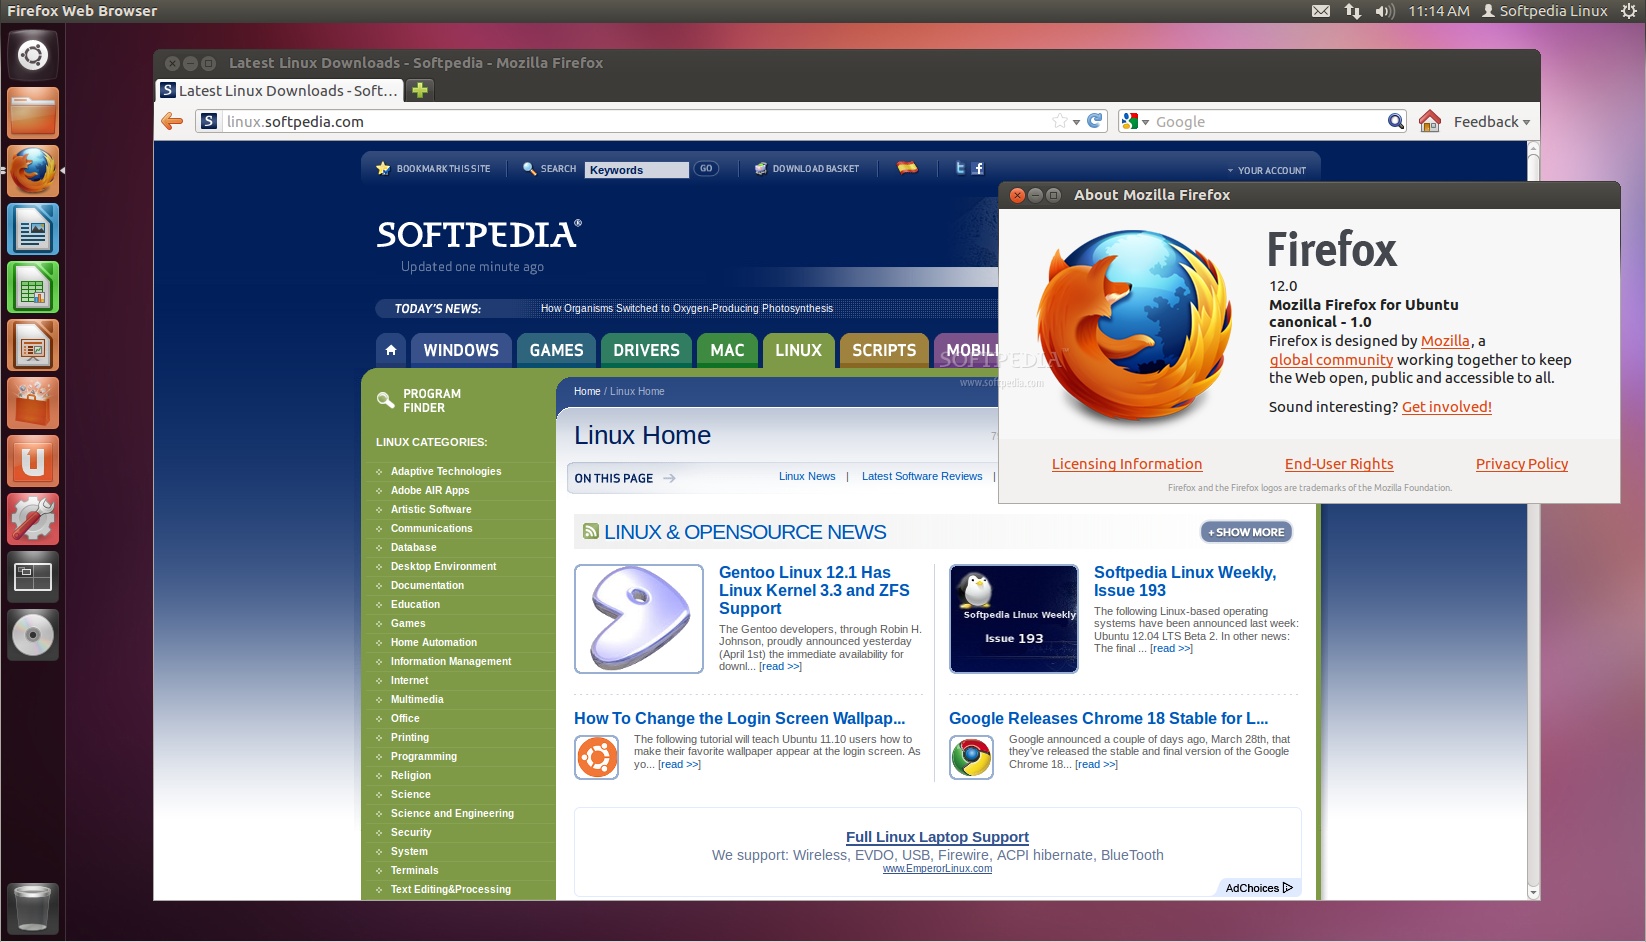
That's it! The new Mozilla Firefox 12.0 is now fully installed in your Ubuntu machine. You'll need to restart Firefox for the changes to take effect.
In time, your Mozilla Firefox web browser will automatically upgrade to newer versions, so make sure you update your system regularly.
To install Mozilla Firefox 12.0 on your system follow the next step-by-step (with screenshots) tutorial.
Step 1 - Add the Firefox 12.0 repository
No matter what Ubuntu operating system (see above supported OSes) you are running, open a terminal and paste the following command:
sudo add-apt-repository ppa:mozillateam/firefox-next
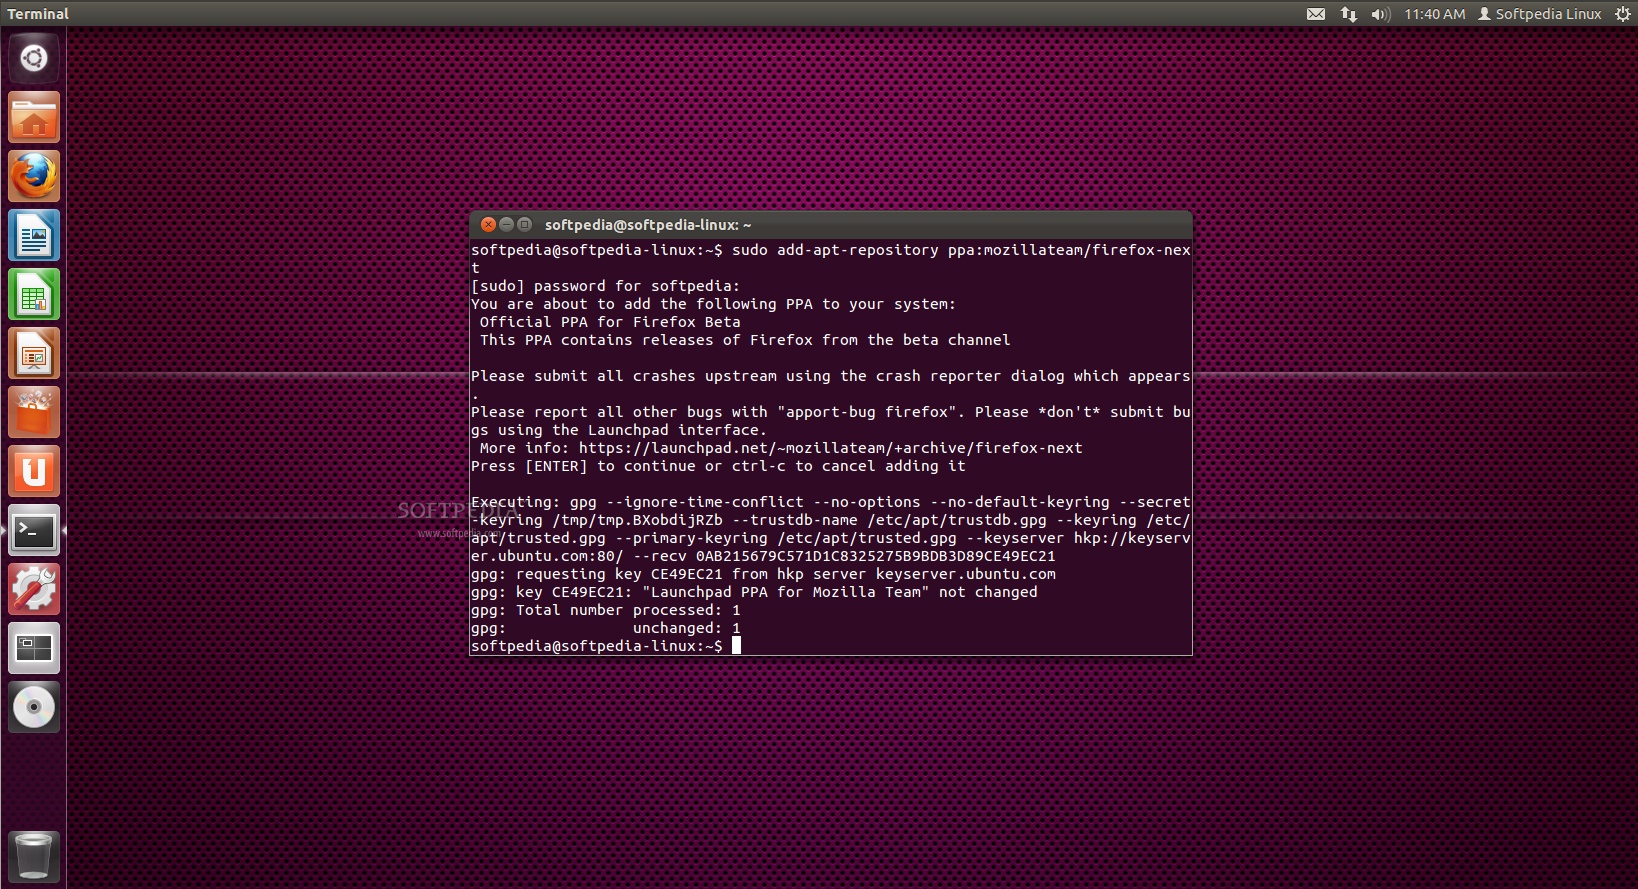 |
Hit the Enter key, type your password when asked and hit the Enter key. Hit Enter again when asked.
Don't close the terminal window! Proceed to the next step.
Step 2 - Install Firefox 12.0 on Ubuntu
Now paste the following command in the same terminal window:
sudo apt-get update && sudo apt-get install -y firefox
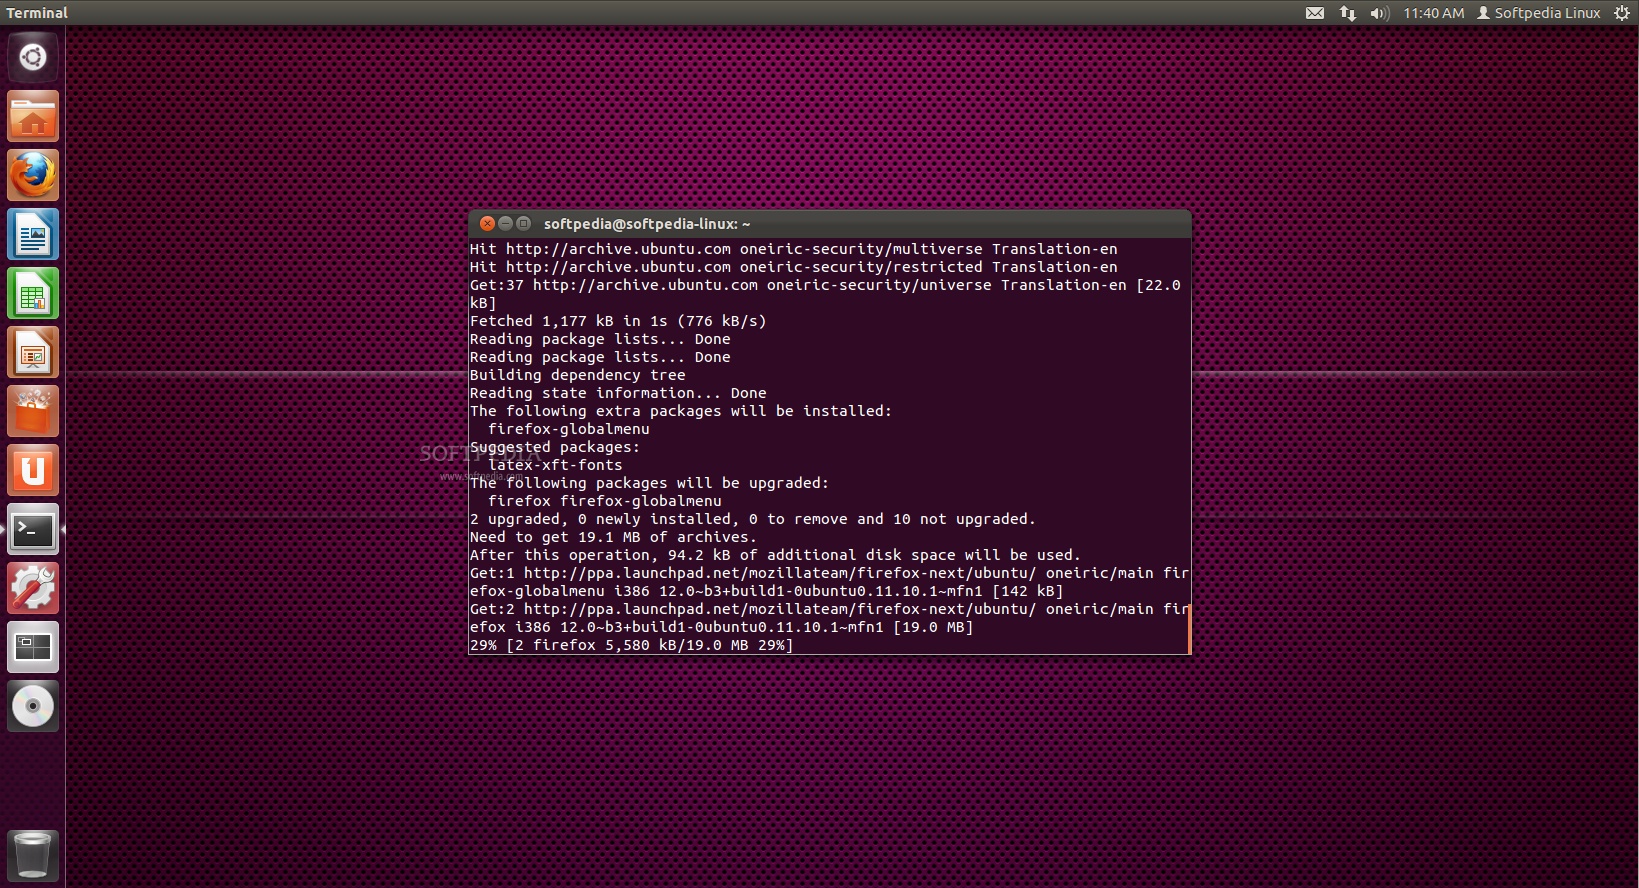 |
Your current Firefox installation will be overwritten. Wait for the installation to finish and close the terminal window.
That's it! The new Mozilla Firefox 12.0 is now fully installed in your Ubuntu machine. You'll need to restart Firefox for the changes to take effect.
 |
In time, your Mozilla Firefox web browser will automatically upgrade to newer versions, so make sure you update your system regularly.


0 comments:
Post a Comment